Mobile and Tablet Devices Review

Cyber Living posts the specifications or details of the latest mobile phones and tablets with some thought comments on the device You can find them by clicking the MOBILE?TSBLET DEV on the menu bar above. Or you can click this link Mobile and Tablet Devices

Computer Problems Solutions

For personal computer/notebook problems and tips, refer to PC PROB from the menu or click this link Personal Computer Problem Solutions.

What's in the world with Philippine ISPs

Discussions about Philippine Internet Service Providers (ISPs) particularly problems users are encountering but are not getting any solutions.

  • Tips or work around to these problems to improve browsing experience.
  • Do you have any problems too? Give your comments below each of the posts to be heard.
  • Or better yet, send me a message on our contact form if you want a dedicated article to your problem on this site.
  • Bloggers and Webmasters tips/tricks

    Looking for something to implement to your site? Our Bloggers' tips/tricks have what you need. If you do not find it there, notify us through our contact form.

    SEO Tips

    Tips to improve your rankings on Search Engine Resuts Pages (SERPs).

    Sunday, February 23, 2014

    Your computer will eventually die

    Whether it is the moving parts nor electronics components that will be the cause, your computer (actually, any electronic item in your possession) will eventually die.

    Yes folks, whether we like it or not, this is the reality.

    I am writing this piece because while I was looking up about hard drives, I came across an article detailing that hard drives and other parts of the computer with mechanical parts are the ones that will kill your computer. He is even very much sure of it by stating that the electronic components like the integrated circuits (IC) will never degrade over a period of time which of course this writer totally disagree.

    This is the reason for this article. To correct any misinformation of such an article and I will be using integrated circuits (ICs) to illustrate my point.

    Let me start by describing in general what a typical IC's inner workings. An IC has the outer packaging or encapsulantion which now a days made of hard, thermoset plastic, that encloses everything to protect the very sensitive "things" inside an IC.

    Inside, you will find the chip (in the semiconductor industry it is called a die) where all the digital magic happens. An IC is made up of silicon doped with other materials to create very tiny transistors. There could be several hundreds of thousands or several millions of transistors packed into a 1cm square area. This is why the outer protective covering offered by the plastic packaging described above is very important.

    Then there is the substrate (or leadframe) that provides electrical connection from the outside of the package to the inside of the IC. Lastly, there needs to be a wire that will connect the chip and the substrate. The material used is a very thin wire (less than or equal to 0.001 of an inch or 0.0254 of a millimeter in diameter) of 99.9% gold. There are other material used like aluminum and copper but mostly gold. If gold wire is not used, a tiny ball of Tin/Lead alloy (called bumps) is used to provide connection of the chip to the substrate.

    The above mentioned is the basic components of an IC. There are other things to complicate its assembly but let's do away with them to make this article simple.

    With that said, each material has what we call interfaces. An example is the chip to encapsulant interface. There are also the chip to gold wire or bump to chip interconnect as well as gold wire or bump to substrate interconnect.

    Now all these interface/interconnects also degrade over time either through temperature changes from its constant use or from the application of electricity to it. Or it can simply be due to its environment.

    To explain this further, when an IC is located in a very humid environment, it could absorb moisture from the air and this is not good for the encapsulant. The result could be increased stress inside the IC that will eventually lead to delamination of the encapsulation to the chip or the substrate. To delaminate means that two materials that were joined has separated. This may lead to broken wire as any movement of the encapsulation will pull the wire until it breaks. It could also crack the chip. In either case, the IC is made defective.

    Another case is that with the constant application of electricity to an IC, migration of materials happen. This is because of the constant movement of electrons, due to the application of electricity, migration is not uncommon to happen. Take for example the gold wire to chip interconnect. With the right condition, like high temperature at powered state, some of the gold wire my migrate into the chip causing void in the gold wire making the connection weak or even brittle that may eventually crack where even a microscopic crack would make the IC defective.

    A substrate/leadframe may also develop growth on the leads and when it grows long enough, it could touch adjacent leads causing electrical short circuit that will damage other part of the circuit board due to high current caused by the short. But the short on the leads, whether there is additional damage on the board or not, will already make a computer or any electronic gadget/appliance to malfunction or will not work at all.

    There are still countless things that can happen but which I can not describe here or this post will become a book. But the above example is enough to demonstrate that just because there are no moving parts an electronic component 5 years ago will be as good as it is today.

    Don't worry though, even if what I have described is true. ICs in the field almost always last within their expected life. This is done by a group within the company that tests the reliability of each product and they are very good at predicting an ICs life.

    To give more insight on the matter, industry standard today expects an IC to live for 10 years on non-automotive parts. If after 10 years it is still working, that's already a bonus.

    Back to CyberLiving home page

    Other Posts
    Back to home page
    Wednesday, January 22, 2014

    How to check a Hard Disk Drive's health?

    You start up your computer then suddenly you hear strange noises coming that seems to come from one of your hard drive. Naturally you start to worry. What if your hard drive is starting to fail? There is a way to check all  your hard disk's health using only what Windows offers.

    Yes, like any other device, a hard drive also has its own "life expectancy". Same thing with other parts of your computer, actually more so for it because a hard drive consist of a moving (rotating) part.

    So how would you determine if your hard drive is already dying? One indication that your hard drive is dying is when you start to see delayed right fail errors. Although a healthy hard drive may also encounter this error, it is more common on a drive that is starting to deteriorate.

    But if you wish to see all your drive's health there are many third party software that you can install which will do such a specific task, that is to monitor your hard disk's status. Be aware though that installing such third party software will contribute to your overall load and may even slow it down a bit or a lot depending on your hardware.

    But that is not what this is about, this is about using what you already have. This is Windows' Disk Management tool. Here is how:

    1. Go to control panel and click on Administrative Tools.
    2. On the Administrative Tools window, click on Computer Management.
    3. Under Computer Management, you will see several items listed on the left of the window. Look for Storage and expand it to reveal another set of list. Locate Disk Management and click it. Wait for several seconds while it propagates all hard drives connected to your computer. When it finally shows all the drives, it will also show each drives' status. In the example image below of my drive, all are healthy.


    Hard Disks Health Status
    List of hard drives with their health status shown under Disk Management of the Computer Management window


    Lastly, it a good practice to always make a back-up of the content of your hard drive. Do not wait until you see signs of failure before you start backing up your data since by that time some of your data may already get corrupted beyond recovery.

    Back to CyberLiving home page

    Other Posts
    How I made my blog in blogger get a page rank?

    Saturday, December 28, 2013

    How I made my blog in blogger get a page rank?


    This blog's rank Free PageRank Checker

    How I manage to get PR3 for this blog.
    Can a freely hosted blog or site such as CyberLiving be able to get a page rank? Look no further, this blog is an example that it can. Read on and you may also learn a thing or two.

    While starting with this blog, I was faced with the question whether it will be worth it to pour my efforts creating and writing content on a free hosted site like blogger because I am not sure whether it will ever going to rank at all on SERPs.

    My apprehension stemmed from the fact that some ad serving companies shy away from such sites as mine (free hosted site or blog) and I have read many articles that gives advise to get a domain and pay for a host server instead of a free one if ones intent is to be able to make some income out of it since it is very difficult (they say) to get a page rank with a free hosting site.

    But as a starter with very limited knowledge with blogging, much so maintaining a site and getting ranked, and no funds to use to pay for a host server and acquire a domain name, I opted to use blogger.

    Site a little over a year old before getting ranked
    To date (12/29/2013), this site is  approximately 1 year and 2 months old. When this site was started, I used the dynamic view template as I liked its simplicity but as I progress, I found I am being limited as to what I can do with my blog. That is when I decided to change my theme to one that is freely available to use. This was around six months from its creation.

    While I was also trying to write content, I am also searching for ways on how to get some page rank. Here I will try to outline what I did that I think gave me my page rank.

    Do some link building through blog commenting and guest posting they say
    Almost any site will tell you that to get some PR, you need to get some link juice from other site. This means you need to do some link building. The most common that is being recommended are: do some blog commenting and guest posting.

    The problem I got from blog commenting is that most of the sites with PR do not just share their link juice which is very much understandable. Many of them are moderated and the chances that a comment gets through to such sites is very slim (well at least in my case it was). Guest posting also shares the same scenario as with blog commenting. To be able to guest post, one has to establish some sort of a relationship with your target site's owner. There are those that encourage you to guest post in their site by sending your article via mail but there is a big chance also that your article which you have spent some time writing it will get rejected. But my biggest apprehension with guest posting is that why should I let others benefit for my work where the page that it was posted may not even get a PR rendering it actually not getting any link juice thereby wasting my time and my work altogether. Or it may be the other way around, being that my work could actually be a very good piece which will eventually make a very high PR then I only gave it away and let someone else benefit more from it compared to me who was the one that actually made the article.

    I decided, therefore, not to focus on it and just put all efforts in writing articles. More explanation on this later.

    Claimed my blog in Technoratti
    I have read from somewhere that one way to get back link is by submitting your site to listing pages like Technoratti. So I did claimed my site at Technoratti. The best thing with technoratti is that it automatically picks from your article and put it up in its list without you having to do anything giving you additional exposure for practically doing nothing.

    Submit my site with Google and Yahoo/Bing
    I know that my site exist, my friends know that my site exists since I do tell them but, Google does not know it. Not yet. Maybe, eventually it will discover it from its daily crawling of the world wide web. But why wait when you can introduce your site to Google. You do this by submitting it and by doing so Google will get to know that such a site exists. Then I used Google Webmaster Tools to address issues. In my case, I only had issue with my site map (missing) which I only submitted my RSS feed as my sitemap (note that with Blogger, there is no way to create a real site map).

    Focused on creating content
    I hate to say content is king in this post as it has been said so so so many times I could vommit (seriously). Why I despise people using such phrase is because, to me, many of them come out like false prophet proclaiming the end of the world that never came. Don't get me wrong, that is very true and I do believe that content more than anything else makes or brakes a site. It is just that many uses it but never actually make a good explanation or argument for it aside from mentioning the usual list of creating original content, good quality article, giving credit where credit is due and so on.

    While it is true that your content is very important, I am not so sure about the original part. Why? That is because in this day and age where almost everything has already been written on the internet, I don't think there is this thing which we can still say as original per se. With that said, I believe that original content would mean writing things, which may already exist on the web, but put into the context of what is the subject of what you are writing or  write it on how it will relate to the overall niche of your site. For me that is what original content means otherwise, the original author (the very first to write that topic) would then also be king but as we all know, that is not the case.

    Going back, I stated earlier on that instead of focusing on link building and guest posting I focused instead on writing articles. My reasoning behind such action is that when I write good enough article at least someone may notice it (by accidentally stumbling upon it or it may actually come up on SERPs) and if he/she likes it may repost it on his/her own site or on social media whereby allowing more people to view it who may also again share it. My hunch did prove correct because some of my posts did captured the interest of people and made links back to their sites thereby effectively giving me some quality back links.

    Made some redesign to my pages
    I already did like my theme but I feel the need to create static pages to my site so I could categorize my posts and make better about pages. On these pages I have also made my code to give it the look that it is today and make my classification to may posts.

    Create internal links
    From my readings, I also came across a theoretical article that with internal linking alone one could generate PR for a site if there is enough pages to link. Without getting into the details of the article, I then decided that I should link all my pages to pass in the link juice throughout my site.

    Rich Snippets
    Going through the SERPs, I have noticed some results are displayed better than others. Others have the photo of the author and the description is actually much more intelligible than others. I later learned this to be rich snippets and it is done through Authorship Markup. It is believed and others could attest that with authorship markup, the click through rate to a site increases. So I also included it into my site. Adding authorship markup to my blog now makes my site in SERP show up much more appealing as it now shows a face of a person (me) along with the result.

    Adding Meta Tags
    In order that I get better description to show in search results for my site's pages, I added meta tags. Together with authorship markup, it now gives my site a better chance of getting clicked when it shows up on search results.

    Lastly.....

    I continue to write more articles. All the things that I have outlined on this post has a dedicated post on how it was done. Feel free to navigate on this blog to look for them.


    Back to CyberLiving home page

    Other Posts
    What are light boxes and how you can make one?
    How to check a Hard Disk Drive's health?

    Wednesday, August 14, 2013

    Coby Kyros MID7047 Android 4.0 Tablet


    Coby Kyros 7047-4
    Coby Kyros 7047-4 overview | source: http://www.cobyusa.com
    Coby 7.0" MID7047 Android Tablet


    Here is an unexpensive Android tablet running on Ice Cream Sandwich designed for budget customers. This is made for those looking for a low budget tablet that has the basic capabilities like web browsing, music playback and playing some basic games.

    Here are some positive notes about this Tablet

    • 7.0" Multi-touchscreen - easily zoom with two fingers as well as other capabilities of a 2-point multi-touch device.

    • Wi-Fi Support - connect to the internet wirelessly through its 802.11 b/g/n comm port.

    • Wide range of media support - play most of the internets sound, video and photo formats.

    User experience:
    No one is talking about this tablet yet. Be the first to comment.

    • Pros
      1. Affordable
      2. With microSD expansion capability
    • Cons


      1. Narrow viewing angle
      2. Not a real Android Tablet as it does not even have access to Google Play.
      3. Lags at times

    Here is the complete list of its specifications:

    Operating System Android 4.0 Ice Cream Sandwich
    Processor / ChipsetCortex™-A5 (Telechips)
    1.0 GHz
    Graphic
    Display7.0” TFT LCD (WVGA 800 x 480),  capacitive Multi-touchscreen, 16:9 aspect ratio
    TouchscreenYes
    LCD Features


    MemoryFlash; 512MB
    Hard DriveBuilt-in 4GB/Expandable up to 32GB
    HDD Interface
    ColorBlack
    MultimediaBuilt-in Microphone
    Integrated Speaker


    CommunicationWi-Fi IEEE 802.11 b/g/n
    ---
    PortsUSB 2.0 High Speed (Micro Connector)
    3.5mm Headphone
    MicroSDHC


    InputTouchscreen
    PowerAC 100-240VAC INPUT, DC 5V output
    ---
    Dimension7.75 x 0.45 x 4.5
    Weight7 lbs.
    Software
    *Software can be changed without notice


    OthersPlays/displays common internet audio/video/Photo formats.
    Available in the following languages:English, Spanish, French (Canada & France), German, Chinese (Simplified and Traditional), Italian, Portuguese (Portugal and Brazil), Korean, Japanese, Russian, Hebrew, Greek, Arabic
    CE, FCC certified
    ---
    ---
    Warranty---
    ---
    Samsung Support Pagehttp://www.samsung.com/us/support/owners/product/XE700T1C-A01US
    (includes manual downloads and FAQs & How Tos)


    Back to CyberLiving home page

    Other Posts

    Monday, August 12, 2013

    What are light boxes and how can you make one?

    Ever wondered what are those square floating boxes that appear in front of the contents of a page when it is loaded or when you click a link like a thumbnail of a photo or a small window inside the current window?  It is called a lightbox.

    A lightbox is very handy when you want to show the content of a link but you do not want them leaving a page. One reason why you might not want your reader to leave a page is because many find it troublesome to go back to a page when they are taken somewhere else even if it is on a different tab or a new window.

    Lightbox is also very useful if a page mostly contains links like in the case of a stock photo page where a user will be looking for many different pictures from the displayed list. Imagine how combersome it would be to be going back from tab to tab or window to window on every sample photo.

    What makes a lightbox
    Basically, a lightbox is only a div element that is positioned above everything else within a page. It is styled in a way that it would look like a new, smaller window inside the browsing window.

    How to make one?
    I want to create one and put it in my site, how can I do it? I hear you say. Below I will describe how it is done.

    Like what was already said earlier, a lightbox is only a div element with the proper styling applied to it. So go ahead, define a div element and give it an id as you wish or you can simply call it lightbox like this:

    <div id="lightbox"></div>

    This of course will not show anything in your screen. Next, define some format to it using CSS like boder width, color, width and height of the box like this:

    <style type="text/CSS">
    #lightbox{
     border: 10px solid yellow;
     width: 400px;
     height: 250px;
    }
    </style>

    #lightbox means these formats will be applied only to the element with an id of lightbox. All the formatting is enclosed with these { }. border: 10px solid yellow; means the border will have a width of 10 pixels, it is solid (not dashed, double or any other type) and it is color yellow. width: 400px; means the width of the window is 400 px and height: 250px; means the window will have a height of 250 px. It would then look like this:


    Let us add a close button
    If you have been observing the internet some uses a circle with an X in it to indicate the close button or a solid square box with also the X on it and some simply uses the word close. All are on the upper right hand corner. I am in the mood for the circle close button so let us do that.

    First create a circle, on how to create one, refer to the guide on creating lines. Fill this circle with the same color as the adjacent element's background (later we will be adding a title bar with orange background so we will fill our close button with orange) but instead of an X, let us place the word close instead. It will look like this:

    close

    The code is this:
    html part:

    <div id="circlecontainer" style="width: 40px; height: 40px; position: absolute; top: 15px; left: 412px;"><div id="close_button"><div style="font-size: 9px; position: absolute; top: 14px; left: 11px;">close</div></div>

    </div>


    CSS Part:

    #close_button{
     width: 20px;
     height: 20px;
     background-color: orange;
     border: 10px solid yellow;
     border-radius: 20px;
    }

    The div with id="circlecontainer" is to group both the circle as well as the word close so it is easier to handle it later in case a javascript is used to on it. The CSS part is mainly for the circle. There are also in-line CSS in the HTML part mostly for aligning the elements together.

    Now put them together in a way that the circle is on top of the lightbox window. We will also make the corners of the lightbox rounded and add a title bar with an orange background color. The following lines will be added:

    First position the circle to the upper right corner of the box by using position: absolute then top: xxpx and left xxpx placed in the CSS for the close_button. The xx are values that will line-up the close-button best to the box.

    Next round the corners of the box by adding corner-radius: 15px. Then to add the title bar, add another div element within the div of the box. Give it a height of 30px and background color of orange. In here we will use again in-line CSS (remember to round the upper corners a bit to match the rounded corners of the box):

    <div style="background-color: orange; height: 30px; border-radius: 5 5 0 0px;"><b>Title Here</b></div>
    So it will look like this:
    Title Here
    close


    Our lightbox is completed. My color selection may not be the best to use for a lightbox. Do some research by looking at what others are using the change it to that color that makes you happy. Also ad content to the box by placing them between the closing div (</div>) of the title bar and the closing div of the main box.

    The last thing we need to do is to make the close button function as it should (close the window). To do this we will use javascript to hide the entire box using the display: none property. By using display : none, it is not actually being closed but only being hidden from view. First group it all by containing it in a single div element then refer to its id when in javascript to hide it. Below is the final code:


    <script type="text/javascript">
    function closeIt(){
    document.getElementById("main_container").style.display = "none";
    }
    </script>

    <style type="text/CSS">
    #lightbox{
     position: absolute;
     top: 40px;
     border: 10px solid yellow;
     width: 400px;
     height: 250px;
     border-radius: 15px;
    }

    #close_button{
     width: 20px;
     height: 20px;
     background-color: orange;
     border: 10px solid yellow;
     border-radius: 20px;
    }
    </style>

    <div id="main_container" style="display: block;">
    <div id="lightbox">
     <div id="title_bar" style="background-color: orange; height: 30px; border-radius: 5 5 0 0px;"><b>Title Here</b></div>
    </div>
    <div id="circlecontainer" style="width: 40px; height: 40px; position: absolute; top: 15px; left: 412px;">
    <div id="close_button"><div style="font-size: 9px; position: absolute; top: 14px; left: 11px; cursor: pointer;" onclick="closeIt()">close</div></div>
    </div>
    </div>

    There you have it. Make your adjustment as necessary.

    Back to CyberLiving home page

    Other Posts

    Saturday, August 10, 2013

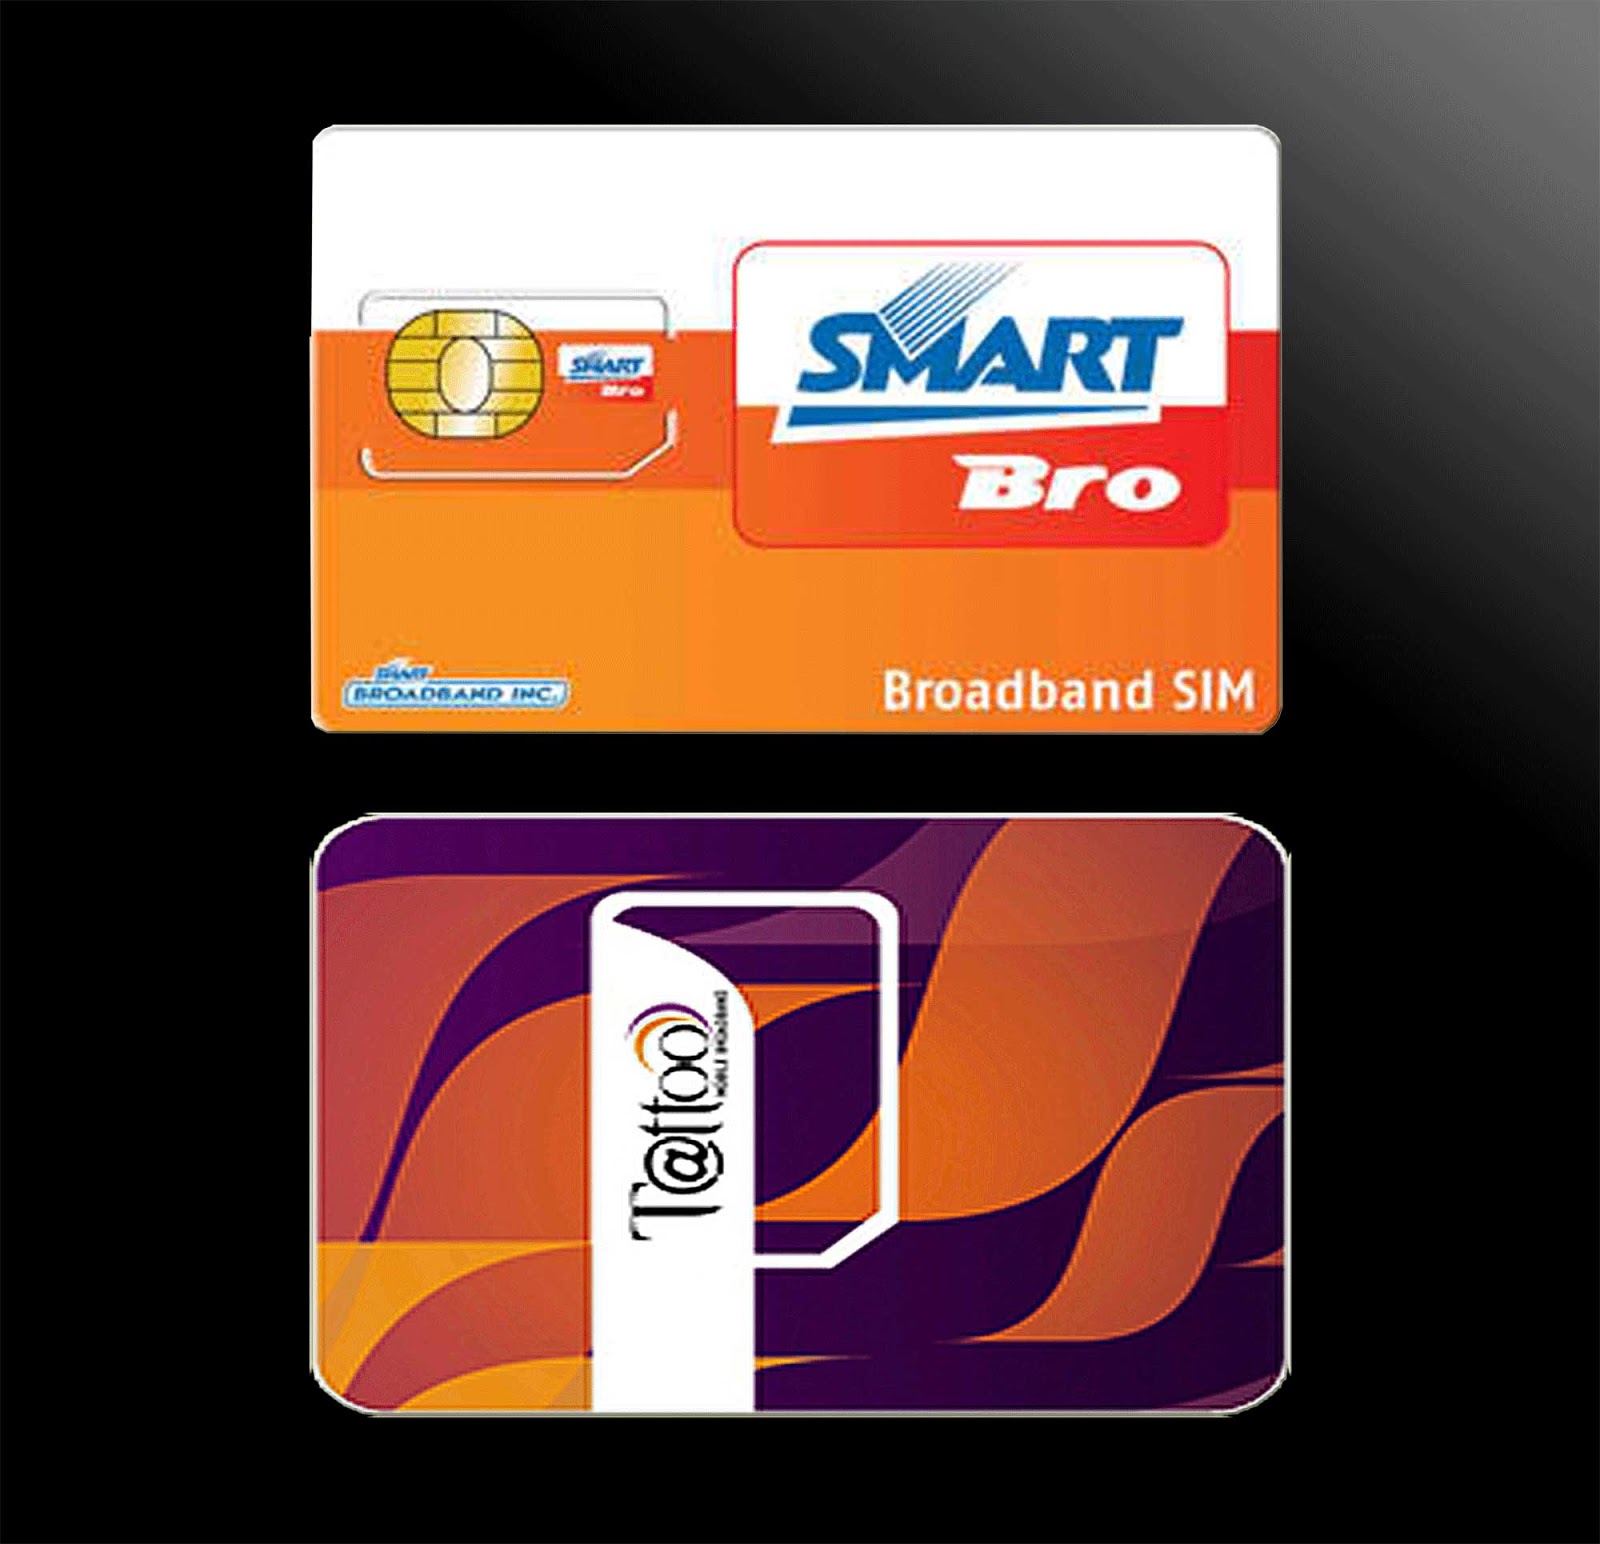
    Is PLDT's (Mybro/SmartBro) Fair Usage Policy (FUP) fair?

    If you are currently a MyBro (formerly SmartBro) subscriber, then you already know and experienced what I am about to tell you. But still indulge me so that you may get additional insight about the matter and please do share this article to others so that they get informed. By spreading the word, we might make PLDT/Smart to rethink about its Fair Usage Policy.

    If you are not yet a MyBro (SmartBro) subscriber, you are in luck. Please read carefully and when you fully understand what has been written here you still wish to subscribe, then all the best to your browsing in the coming months.

    From the TV ads, Smart has been using the term unlimited to their MyBro plan 999. No matter how you try to interpret this, it will always mean that you get unlimited internet access with up to 2Mbps. Please note of the phrase up to that just because the 2Mbps is there, mean that you will get 2Mbps internet speed. I will let other users to comment on it but just to give you a hint, a 1Mbps speed would already be very good.

    myBro (SmartBro) Plan list
    List of MyBro plans including their monthly data usage limit. Plan 999 and 1299 states unlimited.
    But wait, let us go back to their much trumped umlimited data usage. myBro has this thing called Fair Usage Policy (FUP). What is this and why would you care? Well, because this means each month you are actually limited to only so much download and upload (combined) data per month. How much? Many says it is about 15GB a month but PLDT has a very vague description of it. Below is an excerpt of it:

    "Conditions Covering Fair Usage Policy. Certain peer-to-peer and machine-to machine software/applications are used by customers to send and receive files containing very large amounts of data. These activities may cause network congestion and can negatively impact the quality of service that other subscribers will experience. myBro fulfils a service level that is based on equitable share of network resources among all of its customers. Thus, the service level and/or connectivity to users of peer-to-peer and machine-to-machine software/applications is modulated to ensure that all customers get the best fixed wireless Internet experience.
    Upon reaching the optimum volume allocation for a single user, the subscriber will still be able to enjoy unlimited access to the Internet, but at a lower speed. This was implemented to manage overall internet usage and to ensure that all myBro subscribers can enjoy satisfactory internet service."
    Well, to be fair, it stated that you will not get disconnected but your speed will be reduced then by the next month, all will be back to normal. But many will attest that by reduced, it means it will go down to a crawl that a dial-up would even be better. So much for unlimited huh?

    The reason for such a policy they say was for them to ensure the integrity of the network so they can continue to provide a fast and reliable connectivity and that all subscribers will have fair access to network resource. How noble, but say what?!

    First off, why use the term unlimited to a service that is actually limited? At least they should have the decency to say that all users are subject to myBro's fair usage policy. Why are users being penalized for their usage patterns for an unlimited service that has been promised them? Why does Smart not upgrade so they can provide better service instead of penalizing them for downloading so much for using their (I will say it again) unlimited network service? If upgrade is not an option, then don't accept anymore subscriber. Shouldn't this be more fair?

    Secondly, people use the internet a lot these days. They use facebook, skype (or any other VOIP services), e-mails, youtube, online games, system/software updates, file downloads (like e-books), the cloud (iphone music for example) and yes peer-to-peer sharing. Accept that all these are just normal for a user to be doing over the internet aside from the usual Google search for a how to, what is or for the latest news/gossip. Ask anybody if it is normal to be using peer-to-peer software and you will get a resounding YES. What then, will Smart want to change this behaviour? Like I said, stop using the word unlimited that way no one will get deceived and state flat out how much data they are allowed to use each month.

    As if that is not enough, they added:
    "myBro reserves the right to suspend or terminate service to customers whose practices or use of the internet far exceeds that of a personal consumer and, as a result, impairs the quality of service that other customers experience. myBro also reserves the right to modify the Fair Usage Policy without immediate notice in order to maintain the integrity of its network services."
    If I am to understand it, it is all up to them to do no matter what they please so that they could provide a fast and reliable service. Ah! All in the name of good service. Is that what you can call fair? Fair to whom?

    How about existing subscribers prior to the implementation of the Fair Usage Policy? They were promised unlimited network access, no conditions. Unlimited, period. Why apply to them? I almost forgot, they reserve the right to modify their policy, right! Well, could Smart at least give them the right to opt out from the subscription even within the lock-in period? The answer is a resounding NO.

    OK I am done babbling about this policy. But just to give some insight as to  how far a 15GB will last for an average user (note, not a power surfer) here is a summary of usage with corresponding data. Please note this are only estimates and in no way is it measured scientifically.

    Youtube (1min of video = 2MB; average youtube video per month = 1350 minutes that is 45 minute video per day) = 2.7GB <- note that you can download video faster than you can play them and most times you don't watch the entire length of the video especially if that video is not what you are looking for but you have already downloaded the complete video.

    Facebook (50 pictures upload/month at 6MB/picture; 15MBper page @ 150page/month; 3MB per photo view@ 400 photo/month = 300MB + 2.25GB+1.2MB or roughly 3.75GB/month.

    Skype (2.2Gb/hr; 20 hours/month) = 5.5GB/month <- me and my wife use more (way more, like 4 times more, than this every month).

    Online Games (approximately 50MB per hour at 50hours/month; hahaha a little more than an hour a day of gameplay but indulge me) = 2.5GB/month

    System/Software updates = roughly 1GB/month

    This alone will already give you 15.4GB of downloaded data and that is a very conservative estimate. How about the bits of cookies and such that are also downloaded not to mention that each page you visit, you are also uploading some data. I also have not included a user's numerous Google search as well as page visits to different sites. Note that this is only for a single computer. What if you have more than one connected via a router? And let us not forget peer-to-peer download which could easily use 10GB in a month.

    Lastly, to be fair, it is also worth noting that myBro is not alone in implementing a data limit. Globe as well as others have also their own data limit.

    My advise learn your surfing habit and if you think you are within this limit then you can try subscribing otherwise look for an alternative. A local ISP perhaps that has no data limit or at least higher limit? But if you don't have a choice and you are a heavy user, then I feel for you. You may try prepaid plug-it and subscribe an UNLISURF 200 good for 5 days. I have inquired through their service representative and to this day,  this is still not covered by the FUP but most of the time it is also very slow (at least in my case). Just don't buy the dongle with a very limited settings selection in its UI like MF180 and MF190 by ZTE. It automatically connect once it is plugged and there is no way you can disable its autoconnect. I have that experience with the MF180, trust me it is a pain to use. Loosing my load before I could register it to UNLISURF.

    Let me ask again, is the Fair Usage Policy fair?

    Back to CyberLiving home page

    Other Posts
    Back to home page

    Thursday, August 8, 2013

    How to draw lines using CSS

    Do you want some simple lines (vertical, horizontal,diagonal or slanting) but without using images?

    It is quite simple really. By using CSS, you can create the above listed lines as well as circle.

    Let us start with the simpler ones, that is horizontal and vertical lines. To do so, simply create a div element and define the border on one side and you already have a line then define its position so you can place it at the exact location you wish the line be displayed by using a combination of the top, left, bottom, right properties together with the position: absolute, position: relative or position: fixed.

    Vertical line example:
    <style>
    #vertical
    {
     height: 200px;
     border-left: 1px solid blue;
     position: absolute;
     top: 50px;
     left: 250px;
    }
    </style>

    <div id="vertical"></div>

    *You may also use border-right with the same values and it will have the exact same result. The bigger height it is the longer the vertical line.

    Horizontal line example:
    <style>
    #horizontal
    {
     width: 200px;
     border-top: 1px solid blue;
     position: absolute;
     top: 50px;
     left: 250px;
    }
    </style>

    <div id="horizonal"></div>

    *You may also use border-bottom.

    For a diagonal line first create a vertical or horizontal line then add the rotate property.

    Diagonal line example:
    <style>
    #diagonal
    {
     width: 200px;
     border-top: 1px solid blue;
     -webkit-transform: rotate(36deg);
     -moz-transform: rotate(36deg);
     -o-transform: rotate(36deg);
     -ms-transform: rotate(36deg);
     transform: rotate(36deg);
     position: absolute;
     top: 50px;
     left: 250px;
    }
    </style>

    <div id="diagonal"></div>
    *A diagonal line is a horizontal or vertical line that is rotated at an angle.
    **The -webkit-transform: rotate(xxdeg), -moz-transform: rotate(xxdeg), -o-transform: rotate(xxdeg), -ms-transform: rotate(xxdeg) and transform: rotate(xxdeg) all do the same thing. But each only works for a specific browser.
    ***Always supply the same angle to all, otherwise it will be displayed differently on different browsers.

    For a circle, it is still a div element with rounded corners.
    Circle Example:
    <style>
    #circle
    {
     height: 200px;
     width: 200px;
     border-radius: 100px;
     border: 1px solid blue;
     position: absolute;
     top: 50px;
     left: 250px;
    }
    </style>

    <div id="circle"></div>
    *To create a circle, the div element has to be a square thus height and width must be equal.
    **The value of the border-radius must be half that of the side (or half of the height or width value).

    Now let us use a combination of these to draw a very big stickman.


    <!DOCTYPE html>
    <html>
    <head>
    <style>
    #stick_head
    {
    height: 100px;
    width: 100px;
    border: 1px solid blue;
    border-radius: 50px;
    position: absolute;
    top: 200;
    left: 400px;
    }

    #body
    {
    height: 240px;
    border-left: 1px solid blue;
    position: absolute;
    top: 120px;
    left: 450px;
    }

    #left_arm
    {
    height: 130px;
    border-right: 1px solid blue;
    -webkit-transform: rotate(50deg);
    -moz-transform: rotate(50deg);
    -o-transform: rotate(50deg);
    -ms-transform: rotate(50deg);
    transform: rotate(50deg);
    position: absolute;
    top: 140px;
    left: 400px;
    }

    #right_arm
    {
    height: 130px;
    border-right: 1px solid blue;
    -webkit-transform: rotate(130deg);
    -moz-transform: rotate(130deg);
    -o-transform: rotate(130deg);
    -ms-transform: rotate(130deg);
    transform: rotate(130deg);
    position: absolute;
    top: 140px;
    left: 500px;
    }

    #left_leg
    {
    width: 180px;
    border-bottom: 1px solid blue;
    -webkit-transform: rotate(100deg);
    -moz-transform: rotate(100deg);
    -o-transform: rotate(100deg);
    -ms-transform: rotate(100deg);
    transform: rotate(100deg);
    position: absolute;
    top: 448px;
    left: 345px;
    }

    #right_leg
    {
    width: 180px;
    border-bottom: 1px solid blue;
    -webkit-transform: rotate(80deg);
    -moz-transform: rotate(80deg);
    -o-transform: rotate(80deg);
    -ms-transform: rotate(80deg);
    transform: rotate(80deg);
    position: absolute;
    top: 448px;
    left: 376px;
    }
    </style>
    </head>
    <body>
    <div id="stick_head"></div>
    <div id="body"></div>
    <div id="left_arm"></div>
    <div id="right_arm"></div>
    <div id="left_leg"></div>
    <div id="right_leg"></div>
    </body>
    </html>


    Of course this is not how you would use a line to style your page but just to give you an idea as to what extent you can do with it and what has just been demonstrated is the very basic. There are more that you can do with it specially when used together with javascript or similar language.
    Back to CyberLiving home page

    Other Posts
    Back to home page
    How to customize a Google Visualization Table to best fit your page

    If you are using Google Visualization Table to show your data like when making Google Spreadsheet as a database, you may have learned that customizing it is not simply declaring an ID to the containing element.

    The declaration google.visualization.table in itself contains its own CSS styles which defines what you see when the table gets drawn like background color, font size, font face and so on. There are readily available options that you can turn on or off like alternating background color per row but sometimes that is not enough as what is readily available may not be suited on how your page looks like.

    How to override the default styles
    For this to work the option allowHtml must be set to true. Also, there should not be any formatting on the source spreadsheet.

    For the purpose of this post, let us go back to a previous article that illustrates how to use your google spreadsheet as a database. Let us make this table transparent so that it will match and adopt your page's background color.


    • Define the CSS styles for the table elements - create a css class for the following: headerRow, tableRow, oddTableRow, .selectedTableRow, headerCell and tableCell. Set the the background color to transparent and since by default there is no border define one for it as well. Also, since all will be having the same styles, just lump them up in a single declaration within the <style> </style> tag. Here is an example:
    Example: 
    .hrowclass, .trowclass, .otrowclass, .strowclass, .hcellclass, .tcellclass
    {
     background-color: transparent;
     border: 1px solid #c8c8c8;
    }


    • Use declared classes in the table.draw using the cssClassName property - locate the javascript function containing the actual code that displays the table. In this case it is table.draw(data, {'allowHtml': true, 'alternatingRowStyle': true, 'page': 'enable', 'pageSize': 10, 'sort': 'enable', 'sortAscending': false, 'sortColumn': 0}); and add this 'cssClassNames': {'tableRow': 'trowclass', 'headerRow': 'hrowclass', 'oddTableRow': 'otrowclass', 'selectedTableRow': 'strowclass', 'headerCell': 'hcellclass', 'tableCell': 'tcellclass'}. The final result will be this:
    table.draw(data, {'allowHtml': true, 'alternatingRowStyle': true, 'page': 'enable', 'pageSize': 10, 'sort': 'enable', 'sortAscending': false, 'sortColumn': 0, 'cssClassNames': {'tableRow': 'trowclass', 'headerRow': 'hrowclass', 'oddTableRow': 'otrowclass', 'selectedTableRow': 'strowclass', 'headerCell': 'hcellclass', 'tableCell': 'tcellclass'}});

    Now save your work and you will have a transparent table with a gray background. You can even change the color of the border or make it thicker, add more styles as you see fit. Try playing on it to give you what you wanted.


    Back to CyberLiving home page

    Other Posts
    Back to home page

    Tuesday, July 30, 2013

    Nokia Asha 501 Review/Spec

    Nokia Asha 501 front
    Nokia Asha 501 Dual Sim |
    image source: http://www.nokia.com.ph

    Nokia Asha 501 (Dual SIM)

    Here is an inexpensive Nokia phone that would be new phone owner want to buy. At first glance this phone may look like a Lumia only smaller.

    Apparently the Asha 501 tries to go against the current norm and went smaller instead of bigger. The Asha 501 is small at 99.2x58mm (h x w) compared to what we are normally sold in the market these days. There was a time back in the early days of cellular phones where smaller is better, this phone is trying to prove that. Of course the only disadvantage is that with a smaller body, you will also get a smaller display which is not so good when you are browsing or playing games or videos.

    Here are some positive notes about this phone
    Nokia Asha 501 swap SIM
    Easily swap SIM withou loosing each SIM's settings |
    image source: http://www.nokia.com.ph

    • Low data usage full browsing experience - It also tries to minimize data usage while browsing with its Nokia Express Browser. It uses less data while still richly displaying content.
    • Get Social all-in-one screen - With a single swipe, it brings out your social media interface in a single screen. Updating status and receiving them are all in a single screen.
    • Swapping SIM has never been easier - Now it is possible to swap SIM cards and never have to worry about the settings in each SIM. It remembers settings of up to 5 SIMs.


    User experience:

    Here are some comments from people who have already used the device.


    • Pros:


      1. Good battery life
      2. phone is good for its price
      3. gives smartphone experience for a phone that is not
    • Cons

      1. small browsing screen
      2. no support for apps like nimbuzz and whatsapp.


    PricePhp3,000 - Php4,500
    NameNokia Asha 501
    Release DateJune 2013 (Announced May 2013)
    Operating SystemNokia Asha software platform 1.0
    Dimensions99.2 x 58 x 12.1 mm (3.91 x 2.28 x 0.48 in)
    Weight98.2 g (3.46 oz)
    Network TypeGSM 900 / 1800 - RM-899; 850 / 1900 - RM-900; GSM 900 / 1800 - SIM 1 & SIM 2 - RM-902
    SIMOptional Dual SIM (Micro-SIM, dual stand-by)
    Display TypeTFT capacitive touchscreen, 256K colors
    Display Size240 x 320 pixels, 3.0 inches (~133 ppi pixel density)
    Multitouch Display?Yes, Up to 2 fingers
    Vibration AlertYes
    MP3 Alert/RingtonesYes
    LoudspeakerYes
    Speaker JackYes, 3.5mm jack
    Internal Memory128 MB, 64 MB RAM
    Memory ExpansionYes, microSD, up to 32 GB, 4 GB card included
    GPRSYes, Up to 85.6 kbps
    EdgeYes, Up to 236.8 kbps
    WLANYes, Wi-Fi 802.11 b/g
    BluetoothYes, v3.0 with EDR
    USBYes, microUSB v2.0
    Primary Camera3.15 MP, 2048x1536 pixels
    Secondary Camera-
    Video CaptureYes,QVGA@15fps
    AccelerometerYes
    Proximity SensorYes
    Other Sensors-
    MessagingSMS(threaded view), MMS, Email, IM
    BrowserWAP 2.0/xHTML, HTML
    RadioYes, FM only
    GPSNo
    JavaYes, MIDP 2.1
    ColorBright Red, Bright Green, Cyan, Yellow, White and Black
    BatteryLi-Ion 1200 mAh battery (BL-4U)
    Battery | Stand-byUp to 1152 h (dual SIM: Up to 624 h)
    Battery | Talk Time Up to 17 h (dual SIM: Up to 17 h)
    Battery | Music Play TimeUp to 56 h
    Battery | Browsing Time-
    SAR US1.41 W/kg (head)
    SAR EU0.96 W/kg (head)
    Support Pagehttp://www.nokia.com/ph-en/support/


    Back to CyberLiving home page

    Other Posts
    Back to home page

    Samsung Galaxy Tab™ 2 7.0 Review/Specs


    Samsung Galaxy Tab 2 7.0 front view
    Samsung Galaxy TM Tab2 7.0 front view |
    source: http://samsung.com

    Samsung Galaxy Tab™ 2 7.0 (Wi-Fi) 8GB


    Last April 22, 2012, Samsung has released another tablet from their 7-inch series. The Samsung Galaxy TabTM 2 7.0 seems a rehash of the earlier released Galaxy Tab 7.0 Plus.

    To be honest, because many loved the Galaxy Tab 7.0 Plus but had reservations in buying due to its price, they have this released.

    Looking from a distance the it looked like the Tab 7.0 Plus. Only at closer inspection will you see the difference in thickness (Galaxy Tab2 7.0 is slightly thicker). There are also several other downgrades here and there like its front camera which is VGA resolution from an HD quality in 7.0 Plus. CPU speed is now 1Ghz from 1.2Ghz in 7.0 Plus.

    Still, many of the selling point of the Galaxy Tab 7.0 Plus is carried to it like its bright TFT LCD display, microSD slot and rear camera. 

    Here are some positive notes about this Tablet

    • Loaded with lots of apps and can carry lots of content - Although not necessarily a plus, it comes pre-loaded with apps from social media to weather updates, access to Google Play Store, entertainment and many more. Of course a user can always remove apps he/she deems not necessary. And with an external microSD port (up to 32G) of files and media storage couple that with a cloud storage of 50G (good for 2 years free), an owner could carry virtually everything he/she needs.
    Samsung Galaxy Tab2 7.0 endless apps and content
    Endless apps and content at your fingertips | source: http://samsung.com

    • Easily customized - With Touchwiz, things is easily customized and organized giving easy access to contents.
    Samsung Galaxy Tab2 7.0 TouchWiz
    Add a touch of TouchWiz and contents are accessed easily | source: http://samsung.com
    • A home entertainment Tab - Stream shows from TV screens using SmartView. If you lost your TV remote, this Tab can do it for you.

    • Extendable Memory - With the built in microSD slot, memory can be extended and give up to 32G more memory of storage for files like photo, documents, video and music.
    Samsung Galaxy Tab2 7.0 microSD slot
    Load up more data with up to 32G more memory | source: http://samsung.com

    User experience:
    Here are some comments from people who have already used the device. Most feedback are positive.

    • Pros
    1. Bright display.
    2. Built-in speakers.
    3. Leight weight.
    4. Inexpensive.
    5. Realistic color.
    6. Solid feel
    7. With flash player

    • Cons

    1. Can't install apps on the microSD.
    2. Most apps from Google Play are supported but there are still some that it does not support.

    Here is the complete list of its specifications:

    PricePhp11,000 - Php12,800 (as of July 31, 2013)
    Operating SystemAndroid 4.1, Jelly Bean
    Processor / ChipsetTI OMAP4430
    -
    Graphic'none'
    Display7"; 1024x600Pixel (resolution)
    TouchscreenYes
    LCD Features-
    -
    -
    Memory8GB (internal); micro SD card slot supports up to 32GB (external)
    Hard Drive-
    HDD Interface-
    ColorTitanium Silver
    Multimedia3.0 Megapixel (rear)
    Music: MP3, AAC/AAC+/EAAC+, WMA, OGG (vorbis), FLAC, AC-3 ; Sound: AVideo Codec: Mpeg4, H.264, H.263, VC-1, Divx, VP8, WMV7/8, Sorenson Spark; 
    Format: 3gp(mp4), wmv(asf), avi(divx), mkv, flv, webm
    Format: 3gp(mp4), wmv(asf), avi(divx), mkv, flv, webm
    CommunicationWi-Fi Only
    Bluetooth
    Ports802.11n wireless network support
    Proprietary USB and power connection
    -
    -
    -
    -
    Input-
    Power4,000mAh (Battery)
    -
    Dimension4.8" x 7.6" x .41" (W x H x D)
    Weight0.76 lbs
    Software
    *Software can be changed without notice
    -
    -
    -
    -
    -
    -
    -
    -
    -
    -
    Others-
    -
    -
    -
    -
    Warranty1 year limited warranty period for parts
    1 year limited warranty for labor
    Samsung Support Pagehttp://www.samsung.com/us/support/owners/product/GT-P3113TSYXAR
    (includes manual downloads and FAQs & How Tos)


    Back to CyberLiving home page

    Other Posts
    Back to home page