Mobile and Tablet Devices Review

Cyber Living posts the specifications or details of the latest mobile phones and tablets with some thought comments on the device You can find them by clicking the MOBILE?TSBLET DEV on the menu bar above. Or you can click this link Mobile and Tablet Devices

Computer Problems Solutions

For personal computer/notebook problems and tips, refer to PC PROB from the menu or click this link Personal Computer Problem Solutions.

What's in the world with Philippine ISPs

Discussions about Philippine Internet Service Providers (ISPs) particularly problems users are encountering but are not getting any solutions.

  • Tips or work around to these problems to improve browsing experience.
  • Do you have any problems too? Give your comments below each of the posts to be heard.
  • Or better yet, send me a message on our contact form if you want a dedicated article to your problem on this site.
  • Bloggers and Webmasters tips/tricks

    Looking for something to implement to your site? Our Bloggers' tips/tricks have what you need. If you do not find it there, notify us through our contact form.

    SEO Tips

    Tips to improve your rankings on Search Engine Resuts Pages (SERPs).

    Wednesday, April 24, 2013

    Smart 4G network opens its doors to pre-paid subscribers

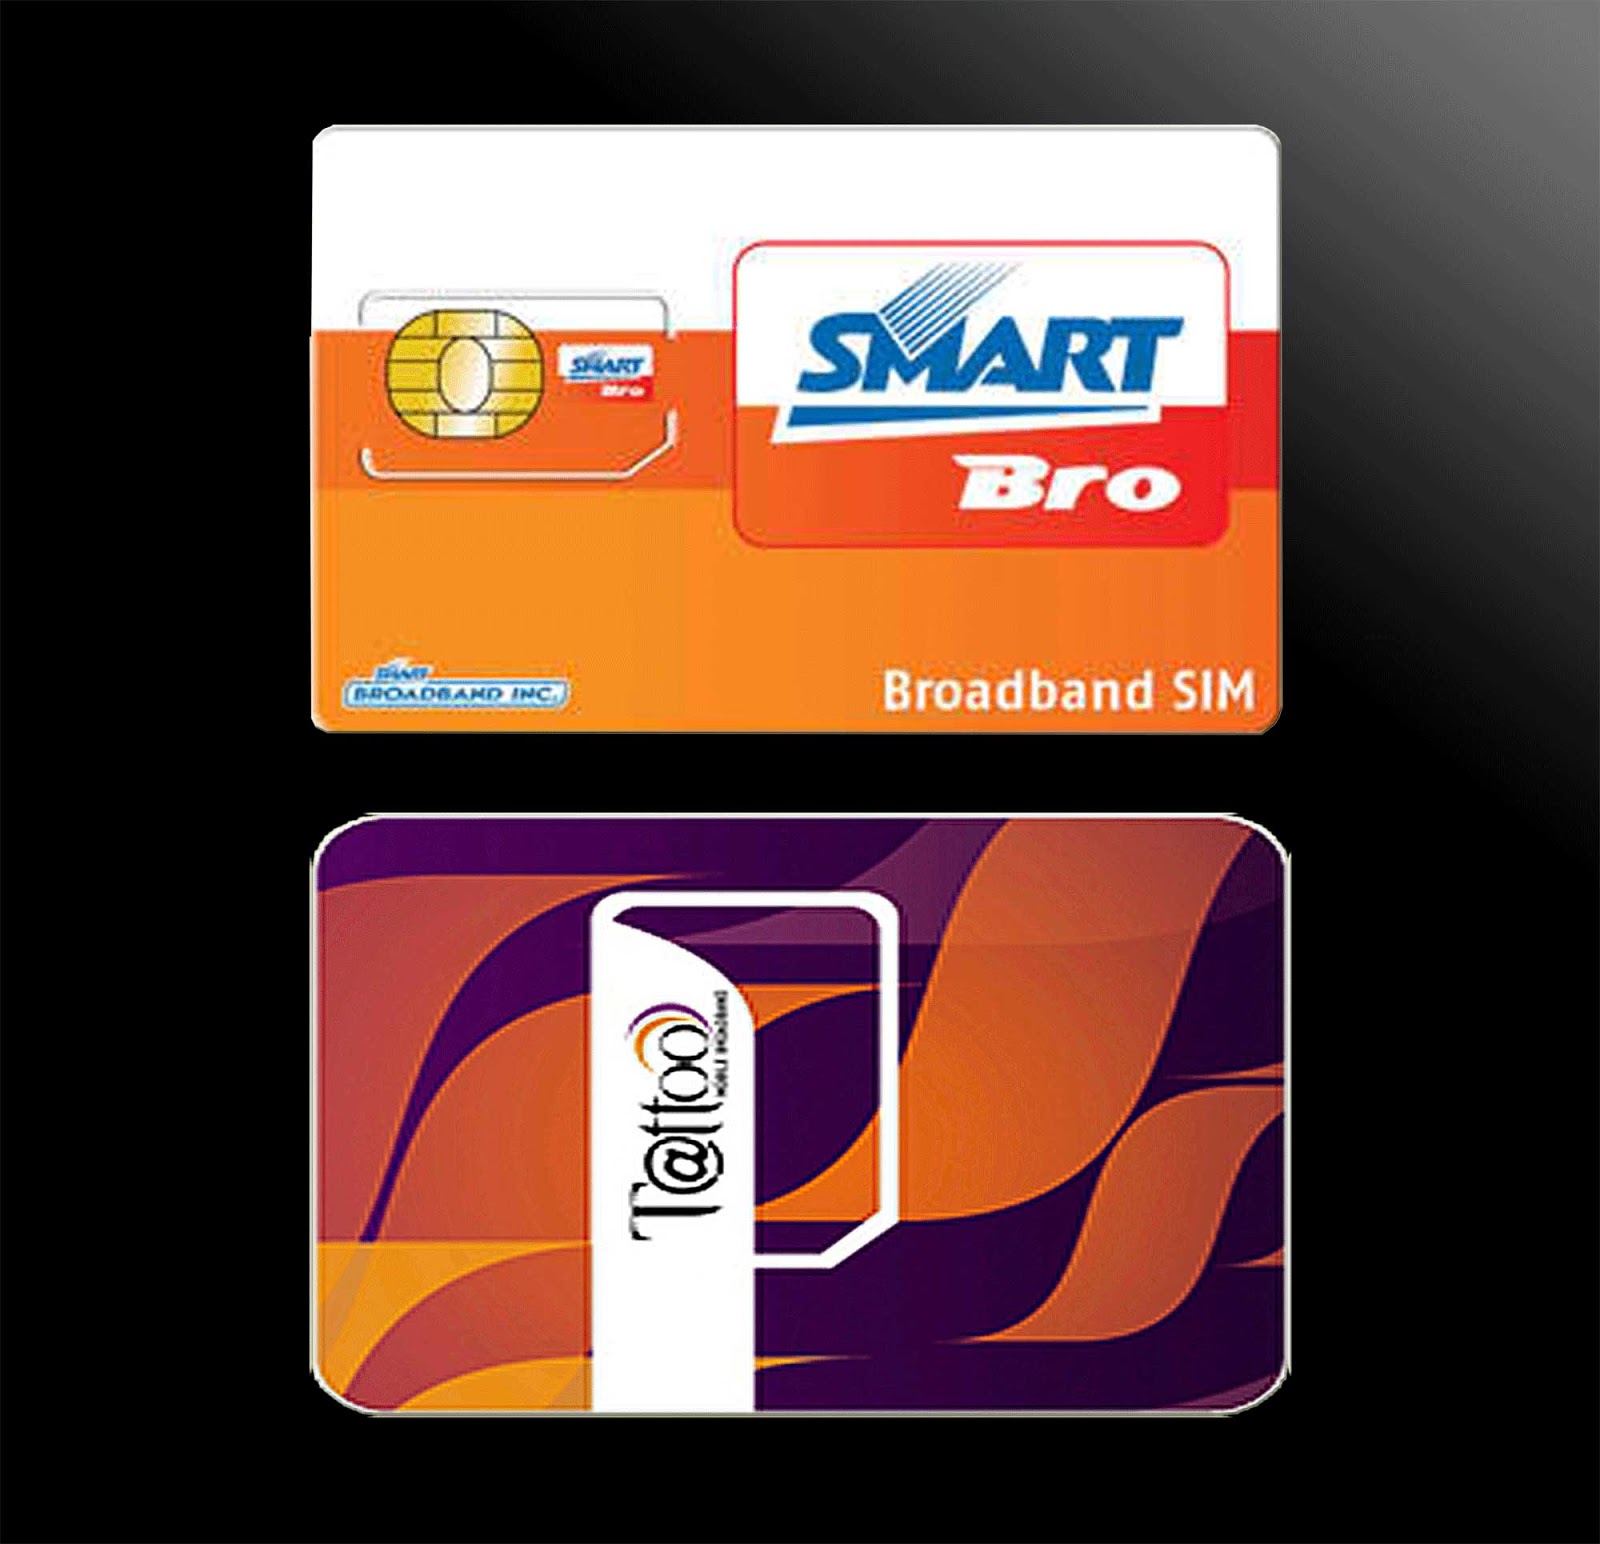
    For those who prefer pre-paid over post-paid now you can enjoy a faster internet speed that only post-paid subscribers were able to enjoy.

    Smart LTE (Long Term Evolution) is now on pre-paid. This was announced by Smart Telecommunications last April 19, 2013.

    According to Smart Broadband and Data Internet Service Head Lloyd Manaloto, “If you have always wanted to try out the fastest wireless broadband technology in the world but are not keen on subscribing to a postpaid service, Smart prepaid LTE is just the ticket.”

    LTE uses Fiber Optic Cables that sends data at the speed of light, unlike the traditional Legacy copper cables that sends signal using electrical pulses that is a lot slower.

    There are two ways you can avail of it. Buying the SIM only kit that costs P350 with free 7 days unlimited surfing or buy the Smart LTE Plug It (SIM and USB modem) which is quite pricy at P5,995 with 7 days free surfing. Since the former is only a SIM, you should have an LTE enabled device or USB modem while the latter can be used practically on any device like laptops, PC or remove the SIM and use it on an LTE capable device.

    The rate is also more expensive with LTE 50 (send to 2200) at P50 valid for 1 day surfing (this is similar to UNLISURF 50). LTE 299 at P299 valid for 7 days and LTE 995 valid for 30 days.

    Back to CyberLiving home page

    Other Posts
    HDD S.M.A.R.T. capability disabled
    Make use of your ISO files without any CD/DVD/Blue Ray discs

    Tuesday, April 23, 2013

    HDD S.M.A.R.T. capability disabled

    If you have encountered the following during start-up:

    HDD S.M.A.R.T. capability disabled

    and you want to enable it, this can be done on your boot menu.

    • Go to your boot menu - Restart your computer then go to your boot menu
    • Navigate on the menu - Look on your boot menu until you see the HDD S.M.A.R.T capability. There are only two options for this Enable/Disable. It should currently be disabled, change it to enabled.
    • Save changes and reboot.
    Simple enough but before doing so, here are some insights regarding HDD S.M.A.R.T. capability

    HDD S.M.A.R.T. (which stands for Hard Disk Drive Self Monitoring Analysis and Report Technology) is a BIOS feature that monitors a hard disk's current status. Its most basic function is to provide prediction and report impending failure of your hard disk (or in a more simplistic word when it is dying) during POST.

    However, with a S.M.A.R.T. aware program installed on your machine running in the background, it can provide real time condition of your hard drive. It should be noted that hard disks nowadays are very reliable thus the S.M.A.R.T. utility don't seem to be much of use. Even by saying that, it is still a good practice to enable it once in a while just to check your hard disk's status by checking if there is any messages saying that your hard is dying. This is specially true if your hard disk is more than 5 years old. If none is reported, you can breathe easy as your hard disk is fine.

    Note though that even with just the S.M.A.R.T. alone it uses some system resources much more so if a S.M.A.R.T. aware utility is installed.

    Still, the best practice is to occasionally back-up your data specially if your hard disk contains very important documents.

    Back to CyberLiving home page

    Other Posts
    Speed up PC performance with msconfig
    Smart 4G network opens its doors to pre-paid subscribers

    Sunday, April 21, 2013

    Speed up PC performance with msconfig

    How to remove unwanted programs from starting during boot-up?

    Programs that launch itself while your computer is starting or rebooting normally runs at the background. And any program that is running, whether vital or unwanted programs, uses system resources effectively slowing down your computer not to mention longer restart.

    One can always stop any unwanted programs that has auto started by manually closing each from the taskbar (right click each icon and click on exit). However, some of their data will still remain on the computer's virtual memory and will only be lost upon reboot. Thus starting a computer cleanly is preferred.

    This can be done by preventing unwanted or scarcely used programs from launching. Here is how to do it using msconfig to configure your computer's start-up.


    • Close all unwanted/scarcely used programs - on the taskbar close these programs individually by right clicking and click on exit on each.
    • Run msconfig - click start button -> click Run -> enter msconfig on the input field and click ok button.
    • Choose programs to prevent from starting - on the Startup tab uncheck all the programs that will not be launched during start-up. Click OK.
    • Restart computer - In order for the new settings to take effect, a system restart is needed. When asked to restart the computer, click on restart the Restart button. In case there is a need to not restart just yet, click on the Exit without Restart button but remember to restart as soon as possible for the new settings to take effect.


    Back to CyberLiving home page

    Other Posts
    Google brings Google+ Comments to Blogger
    HDD S.M.A.R.T. capability disabled

    Saturday, April 20, 2013

    Google brings Google+ Comments to Blogger

    A couple of days ago, Google just made it easier to track your posts' social status in Google+.

    According to Google, enabling Google+ Comments can let others share their comments to your posts to their circle of friends in Google+. Much like on Facebook.

    The neat thing though is that "mentions of your posts on Google+ automatically show up right in your blog's comments, so you can see more of people’s public conversations about your content (and private conversations you’re part of)."  All that without having to add any code to your page's script. You can also do this with facebook but has to edit your html code.

    Just follow these simple steps and you are good to go.


    • Sign in to Blogger
    • Click on the “Google+” tab in your blog’s Dashboard
    • Upgrade to Google+ if you haven’t already done so
    • Enable Google+ Comments. Comments already made on your posts will keep working in the new widget


    Back to CyberLiving home page

    Other Posts
    Windows XP not updating
    Speed up PC performance with msconfig

    Windows XP not updating

    Normally Windows XP does the update automatically for you, if you have enabled automatic update that is.

    However, if this is not the case and when you try to update it through the Help and Support Center (Start -> Help and Support -> under Pick a task click Keep your computer up to date with Windows Update) instead of getting the updates you get this error message instead:

    Error number: 0x80244019
    The website has encountered a problem and can not display the page you are trying to view.
    Error message when trying to update Windows XP.


    You might be having any of the following issues listed below. To solve your porblem, follow  each process as it is  shown. It is advised that you bookmark this page so in case you need to restart your computer, you can get back to it.


    Your Automatic Updates service is missing

    • Click Start then Run. In the Run input box copy and paste these text then click Ok button:
    %windir%\System32\rundll32.exe setupapi,InstallHinfSection DefaultInstall 132 %windir%\inf\au.inf

    • In case your computer asks to insert your system CD (your Windows XP CD installer) or is asked for the location of the wuapi.dll file, type the following text into the Copy files from input box then click the Ok button.
    %windir%\ServicePackFiles\i386


    • If the same message is displayed, then you will need to insert your system CD into your CD ROM drive then click the BROWSE button and select the drive for the CD ROM then click the Ok button. This should continue with install process for the Automatic Updates service.
    • Restart your computer then retry to get the updates (at this point I would like to remind you to bookmark this page if you have not done it yet). If you still get the same error, proceed below.

    It may also be that the Background Intelligent Transfer Service is missing


    • Click Start then Run. In the Run input box copy and paste these text then click Ok button:
    %windir%\System32\rundll32.exe setupapi,InstallHinfSection DefaultInstall 132 %windir%\inf\qmgr.inf

    • In case your computer asks to insert your system CD (your Windows XP CD installer) or is asked for the location of the qmgr.dll file, type the following text into the Copy files from input box then click the Ok button.
    %windir%\ServicePackFiles\i386

    • If the same message is displayed, then you will need to insert your system CD into your CD ROM drive then click the BROWSE button and select the drive for the CD ROM then click the Ok button. This should continue with install process for the Automatic Updates service.
    • Restart your computer then retry to get the updates. If you still encounter a problem, proceed below.


    Download the Service Pack 3 (SP3) manually
    You may not have the Service Pack 3 installed yet.

    • Open a new window of your browser and copy the following text URL into the address bar and press Enter.
    http://www.microsoft.com/en-us/download/details.aspx?id=24

    • You will be directed to the download site for the Windows XP Service Pack 3 (SP3). Click the download button.
    • Once download is finished install the file (following each instruction).
    • Restart your computer. Check if there is still problem with updating your computer.

    Back to CyberLiving home page

    Other Posts
    Connectify great app or not?
    Google brings Google+ Comments to Blogger

    Connectify great app or not?

    In search for a way to share my internet connection, I come across an app called connectify.

    It promises to turn your WiFi capable notebook/laptop into a WiFi hotspot for internet sharing.

    On the download page, it was quite easy get the app. It offers a lite version meaning it is free.

    System requirements also is not a problem. It did install on my notebook that is eight years old with 1.5 Ghz Intel Celeron processor and 256mb DDR RAM. It does however need a .net framework.

    After installation of the lite version, it immediately asks to upgrade to Pro explaining that with PRO you can share your internet connection. At reading this, I got disappointed because I thought internet sharing should have been basic with this service and not only available to its paid version.

    At any rate I continued to proceed using it after declining the upgrade offer with the intention of trying it out to see if it does work.

    After connectify has started and is broadcasting, I tried to check if the network is present. In my Nokia phone running on Symbian OS the connectify hotspot is present and it can easily connect to it.

    Now to check if my Android tablet can find it, which is the main reason I installed connectify. Going to settings, I turned on WiFi but the connectify network can not be found. Several scans still does not show it. Even trying to manually add the network onmy Android tablet did not yield results.

    In retrospect, connectify is similar to adding an ad hoc network (which we already know is easy to set-up refer to Share your laptop's internet connection) using a fancy user interface but is useless to Android devices.

    But wait, that is not all. This application is very stubborn. It launches itself automatically at start-up but it don't want to close. Try closing it by right clicking its icon on the task bar and click exit. The connectify icon disappears but then it will reappear if not immediately, just after a brief period. Even using task manager is not able to close it. There are two processes associated with connectify found at the task manager but closing any of them causes itself to get relaunched instantanuously. If I did not know it to be connectify, I would have thought that it was a virus. The only way to permanently close it is by uninstalling the application.

    My verdict
    Connectify seems to recycle an idea, which in this case is setting up an ad hoc network, that is fairly easy to perform. Well, to connectify's credit, it does make it even easier to set-up an ad hoc network with a nice user interface at that.

    However, with the way this application is behaving, I am a bit concerned for my security. Not that it contains malicious codes in it, I believe it to be clean. But still, call me paranoid, I can't help to be concerned if there is a program on my machine that I can not control. Aside from this, it just a waste of memory resources when not in use but is still running as it can not be stopped.

    To me connectify failed for my purpose.

    Back to CyberLiving home page

    Other Posts
    Becareful of using site:http://www.yoursite.com to tell if your site was indexed
    Windows XP not updating

    Friday, April 19, 2013

    Becareful of using site:http://www.yoursite.com to tell if your site was indexed

    The short answer is, the command site:http://www.yoursite.com does not indicate  if your site got indexed by Google.

    Too often, you see people respond to queries like "How to check if my site got indexed by Google?" with typing the above phrase in Google's search bar. That is just misleading. Because such a querry will bring up all the URLs that have been crawled by the spider but not nescessarily mean that it has been indexed already.

    To support this point, let us look at the difference between the cache and index in Google's perspective. The cache contains a snapshot of what a URL looks like at the time Google spiders it. An index on the other hand is basically a database of all URLs where it gets its results when someone makes a querry (a search). Therefore, if a site is on the list, it is easier to be included in the search results. But it does not mean that all crawled URLs are indexed.

    If you really wanted to know if your whole site is indexed, use the free tool provided by Google which is the Webmaster Tools.

    Back to CyberLiving home page

    Other Posts
    Page rank suffers due to redesign or change in domain
    Connectify great app or not?

    Thursday, April 18, 2013

    Page rank suffers due to redesign or change in domain


    Consider this, you set-up a web page. You worked hard on it, wrote original content, worked even harder to get those very hard to get back links and after several weeks or even months of hard work, all your labor paid off and now are enjoying a very good page rank.

    You continue to work hard to maintain your hard earned rankings. Meanwhile, as what normally happens, some if not all of your original work have been scraped off or copied by other "webmasters" into their site. But of course being the originator of such a content, Google through its search algorithm see this and affords you all the credit and in turn gives your site a high page rank.

    Fast forward to the future, 5 years from now. You decide to redesign your site including your sites structure or you wanted to move your domain. After your new design is done or changed your domain you put it up, waited and watched while Google crawled your site

    But results is not as you expedt it to be because your rankings starts to slide down and you are no longer enjoying a high page rank as you used to.

    Why? Because now Google thinks your content are duplicate from your own page or from others. That is because with the new structure, Gogle creates a new index for your site and this time it thinks that those articles are newly created and seeing that such articles already exist in its index it thinks they are duplicates which we all know is not.

    As a result of this you get penalized by either having those pages that are thought to be duplicates deindexed. Consequently, your page rank suffers.

    There is also the matter of your inbound links becoming useless because they will all become broken and as such their link juice will not flow to your site to help boost your rankings.

    It is unfair, I know, but that is how it works. Of course, you could try to appeal to Google by making a reconsideration request or inform them through some other means but you may not get as high page rank as you did prior to everything for one thing, probably all your back links will no longer be working for you.

    Think about it and tell me what are your thoughts.


    Back to CyberLiving home page

    Other Posts
    Microsoft Windows XP is near obsolete
    Becareful of using site:http://www.yoursite.com to tell if your site was indexed

    Wednesday, April 17, 2013

    Microsoft Windows XP is near obsolete

    Actually it is more of Microsoft ending its support for Windows XP and Office 2003.

    I was browsing Microsoft's support pages when I came across this reminder from Microsoft

    Microsoft XP SP3 and Office 2003 Support ends April 18, 2014.

    Based on Microsoft's policy, their busines and developer products, which includes their Windows operating system and Office products, only receives a maximum of 10 years. It was further explained that this  10 years is divided into 5 years mainstream and another 5 years extended support.

    This means that after April 18, 2014 all support to these products will cease. No more security updates will be provided and therefore it will be vulnerable to attack.

    Actually, this is already apparent. While I was looking for the Windows XP SP3 download, I keep getting a 404 page. I have landed on several pages linking to a Microsoft download page of the said service pack but keeps getting a 404 page or an error message on the page. This is also true to a Microsoft page link to a download page.

    How does this affect specially Windows XP users? Well, very big. One thing very clear is that Windows XP users' machine may not be capable of handling the newer released operating systems from Microsoft which may be the reason they are still on XP.

    For one thing Windows 8 is designed for a 64-bit structure and most probably these machines running on XP is still running on 32-bit.

    In such a case, it is advisable not to upgrade your existing machine and buy yourself a new one that is capable of Windows 8 or 7. But if you are to ask me, I'd go for Windows 8 since it has a longer support period compared to Windows 7.

    What are options left for these "old" machines? It will still function beyond this support period however it may be more vulnerable to intrusions therefore, it is best to look for a third party software that can help you prevent such an intrusion. One I can recommend is the DeepFreeze. Try searching for deep freeze on this blog to give you an idea on what it can do.

    There are also other operating system out there that you may want to try like Linux, Unix, Ubuntu and now Google rolls out an OS called Chrome. This are just a few, there are still others that you may want to try just search them and they are not that difficult to find. What is great about these OS is that they are also secure and not as prone to attack as Microsoft's Windows.

    Back to CyberLiving home page

    Other Posts
    Improve the appearance of your Facebook status link
    Page rank suffers due to redesign or change in domain

    Improve the appearance of your Facebook status link


    How to remove the URL text on your Facebook links

    Many of my friends tell me they are annoyed to see those URL text links that they paste when they wanted to share a find on the internet. I share their sentiments because it does make your post untidy not to mention redundant. Redundant since immediately after pasting a URL, it creates an icon of sort just below the URL link.

    How does other users remove it? It is very simple. With just the backspace (or delete key) you can turn your Facebook status link from this:


    to this:


    Here is how:

    • Add the link as it is done normally : Go to the site you wish to share and copy the URL from the address bar. Go back to Facebook then paste the copied address to the status pane.
    • Wait until Facebook finishes fetching the snippet : Just after pasting, Facebook automatically fetch the snippet to the linked page and adds an icon link.
    • Remove the URL text link : Put the cursor on the URL text link and delete it using backspace or delete key depending on the position of the cursor.
    • Done, just thing left to do : Click the Post button.


    Back to CyberLiving home page

    Other Posts
    SMART Telecommunications rip off practice
    Microsoft Windows XP is near obsolete

    Tuesday, April 16, 2013

    SMART Telecommunications rip off practice

    Funny how Smart Telecommunications is too quick to charge you with services not even rendered but to slow to act on a refund.

    Have you had the MF180 USB modem that is bundled with with a user interface that is very restrictive of what a user can do? Not even to manually connect to the internet? Yes, Smart sells you a USM modem that is bundled with an interface that automatically connects to the internet.

    This is what happened with me today. I accidentally plugged this modem while still loading it with P200. I am supposed to register it to UNLISURF 200 for 5 days unlimited internet connection. But alas, because of what happened it automatically connected fortunately I was able to see it while it is still connecting so I immediately clicked on cancel.

    I thought by clicking on cancel before it could stablish an internet connection, my prepaid load balance is safe. But that is not the case because as I was registering it to UNLISURF 200 an error message told me that I have an insufficient balance. Making a balanced inquiry did show P195.00. I had 5 pesos prior to loading it with P200.00.

    I immediately contacted customer support by dialing *8888. I told the lady my story and she told me to wait while she will try to confirm and told me that I had connected around 11:30 am (of 4/17/2013) that is why they have deducted me with P10.00.

    It is very interesting that when I had 5 pesos remaining in this prepaid account the user interface  connects but there is no internet connection what so ever but here it was connecting prior to being loaded and they already deducted the ten pesos!

    I asked them if they could refund the 10 pesos since I was not able to use it and they told me it will be but I need to wait 24 to 48 hours! Isn't it amazing that in just seconds my P10 is gone just like that even if I haven't established an internet connection and here they are trying to tell me that it takes a day or two just to reverse everything.

     I would not be this upset if the store is just around the corner. But the nearest store to by the card is 5 kilometers away.

    Anyway, which ever way I ask, the same answer is given to me and that is wait 24-48 hours while trying to explain to me that I should configure my UI so it will not automatically connect. I, of course told her everytime that it can not be done on this interface. I guess Smart's customer service does not know about the UI bundled to MF180?

    So here I am stuck with a P195.00 in my load and forced to use UNLISURF 85. Make no mistake though, I am going to follow-up on that P10.00 refund.

    My Suggestion to SMART Telecommunications:
    1. There is an update on the UI, why not roll out an update that will give a user the option to manually or automatically connect to the internet upon plugging in the dongle.
    2. Shorten the period to  verify claims like this. How difficult is it to check the log. I am sure you can develop a querry to speed up the process. And just a suggestion, why not empower your customer service people to do this that way a refund can be done in that instant. Take Taiwan for instance, my ISP back there does things while we are talking on the phone and no need to wait for 24 much so 48 hours.

    Back to CyberLiving home page

    Other Posts
    Share your laptop's internet connection
    Improve the appearance of your Facebook status link

    Share your laptop's internet connection

    Recently, I wrote about how to share a desktop's internet connection. This time I will discuss how to share a wired laptop's internet connection wirelessly also known as an ad hoc connection.

    An ad hoc connection is simply a connection between computers via wifi. If it is a wire connection, it is not considered an ad hoc connection.

    How does this differ differ from my previous post How to share your desktop internet connection? That post was intended to share a connection via a router that way it is still shared wirelessly via wifi while this how to will turn your notebook into a wifi hotspot without needing to connect a wirelss router.

    Here is what needs to be done.

    Start by sharing your internet connection
    1. Go to your network connection (Start ->All Programs -> Accessories -> Communications -> Network connections). On your network connections find your connection to the internet, right click it then click on Properties.

    2. On the properties window, click on the Advanced tab.

    3. On the Internet Connection Sharing box, check the Allow other network users to connect through this computer's internet connection. Any warning that comes up, just click ok.

    4. In case you are using a USB modem and not a wired connection, a drop down window just below this check box will offer you two choices either Local Area Connection or Wireless Network Connection. In this case choose wireless network connection. Choosing Local Area Connection will tell the system to share the internet through the ethernet port which is for wired connection.

    5. Uncheck Allow other network users to control or disable the shared internet connection. This step is to ensure that nobody but the owner has control over the network.

    6. ClickOK and the internet connection is now shared.

    Now turn on ad hoc connectivity and make your laptop a mobile wifi hotspot.
    1. Again on Network Connections, right click Wireless Network Connection and click Properties.

    2. On the properties window, click on the Wireless Networks tab.

    3. Look for the Preferred networks box and just below it is the Add button.

    4. On the Association tab of the new window, input any network name you desire (Network name SSID).

    5. Choose Shared for Network Authentication and WEP for Data Encryption.

    6. Uncheck The key is provided for me automatically to be able to input custom password.

    7. Check This is a computer-to-computer ad hoc network. Then click OK to accept the settings and close the window.

    8. Click OK on the properties window to start the ad hoc network.

    9. The ad hoc network should be ready by now. For other computers to connect to this network, the network has to be provided.

    **Note that as of this writing (April 7, 2013) an Android device could not detect it. This was tried on an Android tablet with Ice Cream Sandwich but it could not find the ad hoc network. Nokia phones however with symbian O/S were able to detect it.

    Back to CyberLiving home page

    Other Posts
    Make fonts larger for easier reading
    SMART Telecommunications rip off practice

    Sunday, April 14, 2013

    Make fonts larger for easier reading

    At a gathering a friend asked me, I have trouble reading through my computer. The letters are too small. Please help me to make it bigger.

    The solution is very simple and it is called zoom. When you are at your browser, just press Ctrl then press the plus key at the same time (Ctrl + plus key). That is it, the next time you open your browser again, it remembers your previous setting and gives you the same bigger fonts like the previous time you open it.

    If you wish to make it smaller, just do the opposite, press Ctrl plus the minus key at the same time (Ctrl + minus key).

    Now, however, that does not affect the appearance of your window. To make the fonts in your windows bigger, click on Start, then click Control Panel. At the Control Panel, click on Display. At the display setting window, click on the Appearance tab and at the bottom of it is a drop down window click the down arrow botton to bring down a list. You may choose from normal, large fonts and extra large fonts then click apply button to test it out. Once satisfied, click ok to accept the setting. Done!


    Back to CyberLiving home page

    Other Posts
    Our systems have detected unusual traffic from your computer network
    Share your laptop's internet connection

    Saturday, April 13, 2013

    Our systems have detected unusual traffic from your computer network

    I was searching for something using Google on the internet one morning but because it was quite difficult to find, I was searching somewhat actively. By that I mean, I tried diffirent phrases and I did it simultaneously. I had about 3 windows doing searches at the same time. I guess, it is worth noting that at the time of my search, I am having a rather slow internet connection which explains why I had 3 searches going on at the same time. As I move along with my searches, I am also getting that message more often and so I decided to investigate. Here is what I have found.
    Not all the sites I visited redirects me to this error message. And so it
    looks like it was related to some search term or at least to the particular
    search term I am using during that time.


    Clearing my cache did not made the problem go away. As we all know, a virus can cause your computer to behave abnormally including sending information from my computer to some place who knows what. And so I checked my computer with my favorite anti-virus and anti-malware programs but did not find any threat.

    Others also suggested that maybe I have a conflict within my network (that is from my ISP, I do not have a static IP and obtains it automatically by my service provider). Instead of going to the command prompt release and renew my IP, I did reboot everything. Restarted my modem, my router and my computer (no other computers were connected to my router that time).

    After the restarts, I did not encounter that message again. Aaah! The magic of reboot. I did not know exactly what happened because after reboot, things went back to normal but Google team have some more extensive course of action you may take like the following:


    • A malware maybe causing this. They recommend to use HijackThis.
    • After HijackThis, they recommend to use other antispyware and antivirus softwares to check for further infection.
    • Check your network for other computer that may be doing this or ask your network administrator to do so.
    • If still unable to find the problem, contact Google support group.
    Lastly, here are some of automated traffic not permitted by Google:

    1. Sending automated queries
    2. Using software that sends queries to Google to determine how a website or webpage ranks on Google for various queries
    3. 'Meta searching' Google
    4. Performing 'offline' searches on Google

    Back to CyberLiving home page

    Other Posts
    Keywords and Google search
    Make fonts larger for easier reading

    Thursday, April 11, 2013

    Keywords and Google search

    I have read not so recently on some article that keywords are not important to search engines and I was lead to believe that instead of focusing too much on keywords, it is best to focus on creating more quality articles.

    But recently, I came to the realization that what I have read is false. While it is true that quality posts are important, keywords are quiete as important. This I found after making my review of the tablet I bought.

    When I made that article, I wrote it keeping in mind my target keywords. No I did not reasearched it but I used the keywords I normally would use when I search it. Fortunately, those keywords seem to be the most prominent being searched because after checking my stats after several days that it was published showed it was the reason my visitors landed on this blog.

    If keywords weren't important, why would Google Analytics still bother to report it? And why would they still bother to maintain the Google Keyword Tool site?

    In my humble opinion, while it is true that quality and original article are important to get ranked higher in Google and other search engines, it is equally important to place important yet relevant keywords to your article. This is specially true to individual posts or pages in your site because without them, no matter how good an article is if important keywords are missed out, it will never see the light of day and no body will be ever to read it. Think of it as the beacon that will lead people to find at least your particular article.

    Back to CyberLiving home page

    Other Posts
    Pokoyo and Talking Pokoyo at Playstore
    Our systems have detected unusual traffic from your computer network

    Tuesday, April 9, 2013

    Pokoyo and Talking Pokoyo at Playstore

    I recently discovered Pokoyo while me and my son are looking for some fun video we can watch together at Youtube.

    To those who does not know it yet, Pokoyo is the title of a cartoon which is incidentally also the name of the main character.

    Pokoyo is very likable what with very cute characters. The animation is properly drawn with the correct shadings with which they appear very cuddly. First time I set eyes on it, I am immediately drawn to it. But what makes it unique was the simplicity and how neat things are presented. Most of the scenes I have seen so far are set on a white background with only the main character and some of his friends with a little of their toys.

    Pokoyo is not the usual cartoon we encounter in that it doesn't really have any story except for what Pokoyo is doing or is supposed to do. Pokoyo does not talk. There is however a narration in a fatherly voice. Sometimes it explains what Pokoyo is doing and at other times it talks to Pokoyo and he in turn responds into action and the subject matter are things like how to play with friends, keeping toys or simply engages with the viewer's imagination.

    Pokoyo is for toddlers and older for learning simple things. If you wish your kids to learn ABCs and 123s this is not the video to watch beacause from the three video I have seen so far this is not the kind of stuff it wants to present. Of course I could be wrong.

    And because me and my son fell in love with Pokoyo I thought there must also be Pokoyo stuff at the Playstore. Search Pokoyo at Playstore and you will come up with Talking Pokoyo. Similar to the talking cat, dog, etc. Talking Pokoyo mimicks what you say. By touching parts of his body, it will show you its moves. Aside from this, it also can play some musical instruments. It also teaches the different sounds and moves of some animals. It has also a slew of different dance moves. All these can be selected through the different icons shown on screen. The free version has limited musical instruments and dance moves activated. It also shows advertisements when connected to the internet. One thing is for certain, free or full version, this is a fully working app that is worth downloading and your toddler will surely love.

    Back to home page

    Other Posts
    One way to create backlinks-Claim your blog in Technorati
    Keywords and Google search

    Monday, April 8, 2013

    One way to create backlinks-Claim your blog in Technorati

    As you may have read already, one of the ways to get ranked by Google is to get a link from an authority site back to your site. You do this by either commenting on blogs or guest post on other blogs. Another is by submitting your site to directoris/how to sites. These how to sites put your site to their list and by writing articles for them it will rank you by authority depending on how popular your posts are. If your authority is high enough your site will figure on the top of the list. So in a way this is similar to guest posting.

    So this is what this post is about, I have just claimed this site in Technorati. Claiming is what Technorati calls when someone submits their site on the list. I am making this so it will sere as a reminder on how to claim a blog in Technorati for me and for others interested on it as well.

    To start claiming, log in to Technorati. If you have no account there yet, sign up then log in. After logging in, go to the bottom of the landing page. There you will see an input field "Start a blog claim" then click claim.

    After this just follow the succeding instructions and supply all the required information. Once done, you will recieve a claim token in your inbox. Use this claim token to place it on your blog just to prove that you are the owner of the site by having the authority to edit it.

    That is the other reason for this post. I needed to put the claim token that I recieved which was 8Z3GHBSY586R. :-)

    After publishing this post, or in your case posting your claim token in your post, go back to your technorati account page and there look for your recently claimed blog and then check claim just below the icon.

    Back to CyberLiving home page

    Other Posts
    Making a link on Blogger's Dynamic View landing page
    Pokoyo and Talking Pokoyo at Playstore

    Sunday, April 7, 2013

    Making a link on Blogger's Dynamic View landing page

    As everyone may know by now, I love using Blogger's dynamic view for my blogs. And so this past two days I have been looking around to see what has changed since its inception. Sad to say, there is not much that changed, by that I mean design wise.

    Since dynamic view was rolled out, users are restricted on using it as it is. No modifications can be done to customize it. Well at least now some gadgets can be added namely Blog Archive, Followers, Labels, Profile, Subscribe, and Link List.

    These gadgets can be added through the Layout tab. If in any case you decided to add a gadget not yet allowed in dynamic views, blogger will simply ignore them.

    But you know what triggered me to check what is new to dynamic views? It was simply to add a one line link to permanently appear anywhere on my landing page.

    Since I am not an expert with CSS here is my work around to the problem. I simply created a static page and named it to the anchor text that I want then point this to the page that I want it to open when it is clicked. Now I have a text link on my home page that appears on the navigation bar.

    Back to CyberLiving home page

    Other Posts
    Site map for Blogger and how important is it?
    One way to create backlinks-Claim your blog in Technorati

    Friday, April 5, 2013

    Site map for Blogger and how important is it?

    I am writing this post in the hope that anyone who will read it will not suffer the same thing that I did.

    Fist a little background
    I went to webmaster tools (my first time) and was going through all the tools and when I got to Blocked URLs, I noticed I have a huge number under Blocked URLs. This got me a bit curious so I check my robots.txt to see if somehow there are listed URLs there but there are none. Well there should be none because I have not configured it to not crawl any of my posts/pages.

    My investigation
    I don't understand why I should have a big number of blocked URLs, actually by my estimate, it was my entire blog content. This should not be so because doing a search for site:http://cyberliving.blogspot.com to check if my site is being crawled and indexed shows all my pages. This only means that I have not been blocked or penalized by Google.

    I as able to breathe better knowing I am not being punished by Google. But something is really wrong because webmaster tools is reporting some blocked URLs. I checked my index status and imagine my shock to find out that it is showing 0 (zero) total indexed, Blocked by robots show the same number as the Blocked URLs but Ever crawled is showing a steady increase.

    I have checked my other blogs if it is showing the same problem (I thought that maybe there was an error on this tool) but my other blogs are showing a good amount of indexed page and none on the Blocked URLs.

    The realization of the problem
    Well now I am starting to understand things. Making some comparisons on what I did to my other sites compared to my current problem, I have come to realize that I did not make a site map.

    I then went ahead and updated to update my site map and voila! all my URLs have been submitted and after a day, I can see that all my URLs have been indexed.

    Before this, I have not really considered a site map to be important but after seeing what it has done for this site, I urge everyone that it is one of the first a webmaster needs to do in order for search engines to crawl your site extensively and get indexed properly.

    Site Map
    I tell you now my fellow blogspot users, the only site map we can use for blogger are RSS feeds. If you go search the internet on how to create and submit a site map for your blogspot site, you will only be disappointed and maybe confused. There is NO WAY you can use an XML or any other file as site map. I am stressing this point to save you the same trouble that I went through.

    So RSS feed it is. There is also one good thing about using feeds as site map and that is you do not need to update your site map every time a new page is added to your site which is particularly useful when you are blogging because all you need to worry about is creating your posts and your feeds will do the job of updating your site map.

    Fortunately, an RSS feed is already made for you when you create your own blog and it is powered by Atom. Its location can be found in your robots.txt file and your robots.txt file can be accessed through webmaster tools -> Health -> Blocked URLs (or you may type in the address bar http://YOURSITENAME.blogspot.com/robots.txt). In there you can already see the content of your robots.txt file. Look somthing like this:

    Sitemap: http://YOURSITENAME.com/feeds/posts/default?orderby=UPDATED

    Submit your Site Map
    Copy everything after the .com (blue fonts from above) then go to Webmaster Tools -> Optimization -> Site Maps -> Click ADD/TEST SITEMAP. Paste on the input box the content of your clipboard (feed location that you copied from robots.txt). You are done. After submitting a sitemap the list of submitted maps will be updated together with its status.

    If you still have some doubts or question, you may post them on the comments section and so long I will try to helps as much as I can.

    Back to home page

    Other Posts
    Unlimited Surfing, What is the catch?
    Making a link on Blogger's Dynamic View landing page

    Unlimited Surfing, What is the catch?

    The current trend in the Philippines to date when it comes to internet connection is UNLI, short for unlimited, meaning subscribing to this promo entitles you to unlimited surfing until your time runs out for the promo. This was born out of their unlimited texts and voice promos. Owing it to the unlimited voice and text success we now get UNLI Facebook, UNLI mobile surfing and UNLISURF for Smart and SUPERSURF for Globe.

    What I would like to talk about with you my dear readers is whether they are really unlimited.

    Here is what I have found out. Globe's SUPERSURF which is supposed to be unlimited ain't really. Try SUPERSURF 50, for a 1 day "unlimited surfing" then watch lots of videos on youtube and download large files. Before you know it, you are already being disconnected even before your time has lapsed. Why? Because SUPERSURF has a data limit. This was confirmed to me by a service rep through their hotline and this is actually on their site as well. What bothers me was their ad on TV says unlimited surfing and there is no mention of the data limit. It was explained to me that technically, the data limit ensures already of unlimited surfing in that if only sites with no video streaming is involved. I was further advised that if I so choose to watch youtube videos I should avail of the more expensive package or use regular load. Duh! Isn't Youtube part of the world wide web? Clearly, they should remove unlimited in their promos and put in place enjoy up to 800Mb or so of data as the unlimited thing is misleading.

    For Smart's SUPERSURF, it really is unlimited. No data limit restrictions. I found though that Globe was faster than in Smart through my experience. But Smart also employs similar tactics as Globe with their other unlimited promos. I was once bombarded with promotional text messages from Smart regarding unlimited mobile browsing. If memory serves me right the command was ON 20. The text also says unlimited surfing but at least they included somewhere in the text the data limit (I think).

    So next time you avail of a promo, look for what they are not saying. Because if you have a nagging feeling that something is not right, it may well be true.

    Back to home page

    Other Posts
    How to share your desktop internet connection?
    Site map for Blogger and how important is it?

    Wednesday, April 3, 2013

    How to share your desktop internet connection?

    If you are like me who is using a USB dongle/modem to connect to the internet yet you want to share this internet connection with your other devices via your desktop's ethernet port to a router but don't know how, then read on.

    I have searched on how this is done and most I have read is to make a bridge connection yet this requires configuring both your desktop and your router which I managed to make it work for a while after working on it for several hours (I am no tech expert that is why I had some difficuly setting up a bridge connection). But after 2 days, my tablet will no longer connect wirelessly in bridge mode so I had to figure a way to share without putting my router in bridge mode.

    What you will need:
    ethernet cable
    router (with wireless capability or not)

    1. Go to internet connections window (in XP click Start button - Accessories - Communications - Internet connections)

    2. On the Internet Connections window, click on "Set up a home or small ofice network" from the left hand menu under Network Tasks.

    3. On the welcome pop-up window click next then click next again on the "Before you continue..." window.

    4. Select "This computer connects directly to the Internet..." radio button on the next selection then click Next.

    5. Then select your Internet connection (the one that you use to connect to the Internet which you want to share) and click next.

    6. Provide a computer description and computer name (anything you wish) then click Next.

    7. Supply also a workgroup name that you wish then click Next.

    8. If you wish to share files then turn on file and printer sharing, otherwise select turn off file and printer sharing. If you turned off file sharing, and wished to turn it on later, you can also turn file sharing on file explorer. Click Next.

    9. The next window will show you the summary of all your inputs. Review it and if you wish to change any entry, click back. If you are satisfied with it, click on Next.

    10. If you wish to set-up other PC that connects to your router via its LAN port select Create a Network Setup disk. This is what you will use to configure other PCs to connect via the LAN port. In my case I just select "Just finish the wizard; I don't need to run the wizard on other computers." since I only connect through  WLAN (Wi-Fi). Click Next.

    11. If you choose not to create a setup disk you are almost done, just click finish on the last window and proceed to step 13. otherwise continue to the next step.

    12. Select where you wish to save your setup information then click Next and finally click Finish.

    13. After completing the set-up, connect your ethernet cable on your computer's ethernet port and on your router's WAN port.

    That is it, you are done. There is no need to do anything on your router. Any previous settings your router has, like your wireless password, remains unchanged.

    You may write your thoughts on the comments section of this page.

    Back to home page

    Other Posts
    Deep Freeze an alternative PC protection
    Unlimited Surfing, What is the catch?